WordPress Page Speed & Performance Optimization Tips: Images
Images are the heaviest resource of any web page which makes it very important to optimize them. Check out my tips you can implement to get some quick wins.
We can’t afford having slow websites and while we try to optimize them and make them as fast as possible, it gets technical quite quickly. For that reason I’m going to publish a short series of articles about web page speed optimization tips for non technical users managing WordPress websites.
The first article is about images. They are the heaviest resource of any web page which makes it very important to optimize them. Below is a list of tips you can implement to get some quick wins.
1. Don’t use images
Exactly, don’t use images if you can.
If you can avoid using an image and can replace it with a heading/button/HTML block then do so. An image can be quite heavy and for each image resource the browser is making a request from the server. By replacing an image with some text or HTML, we can save for some bytes and make one less request.
2. Use SVGs
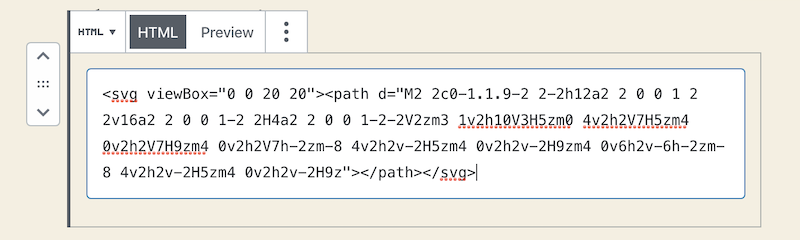
Use vector graphics instead of regular image formats such as jpg, png, etc. You can use .svg directly in your HTML and it is faster than loading an image from server.
Instead of using <img src="website.com/image.svg"> use <svg> … </svg> directly.
To add SVGs directly to your page content, copy and paste it into an HTML block. You can also preview it in your editor.
This works best for small and simple graphics such as icons and logos. Inline SVGs are part of the page HTML, so the browser can’t cache them separately. If you have a large SVG or use the same one on many pages, loading it as a regular file with <img> may be the better option.
3. Use CSS instead
Use CSS instead of images if you can. Mostly this can be done for buttons, simple banners, text logos etc. For example - the logo is just text and some styles.

4. Use proper image formats
Use modern image formats - WebP and AVIF. They are much smaller than .jpgs and .pngs with the same quality, support transparent backgrounds, and all modern browsers support them. WordPress lets you upload WebP images, and AVIF images since version 6.5.
If you’re still using the older formats and don’t need to have transparent backgrounds in your images, make sure to use .jpg instead of .png, generally .jpgs are smaller in size than .pngs.
Also, never use .gif as a static image as they are huge in comparison, and if you’re using them as animated graphics try replacing them with animated .svgs again if you can.
5. Use scaled images
Pay attention to image sizes and don’t upload images larger than you need, larger sizes = more bytes. For example, if you’re using an image on the side and it’s never wider than 300px then resize it before uploading and use the scaled size.
Use WordPress image sizes
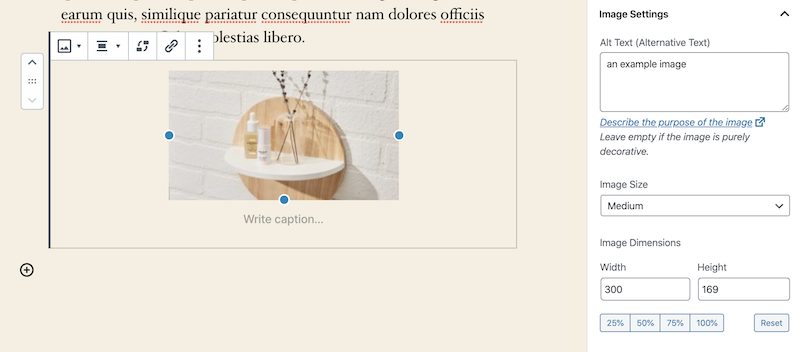
You can “resize” images right in your WordPress dashboard while editing a page/post. Simply select a predefined image size (Thumbnail, Small, Medium, Large, Full size) or define the dimensions yourself.
WordPress also adds the srcset and sizes attributes to your images automatically. They list the available sizes of the same image, and the browser picks the most suitable one for the screen, so mobile users don’t have to download the full size image.
Use media queries for background images
If you’re using background images that are large and heavy, you can use different images for different screen sizes. An example for 2 sizes:
/* for small screens */
.hero {
  background-image: url(hero-small.jpg);
}
/* for screens wider than 768px */
@media (min-width: 768px) {
  .hero {
    background-image: url(hero-large.jpg);
  }
}
6. Use an image optimization tool
Image files generally contain a lot of meta information that are not necessary and they are part of the image weight. Sometimes a simple image optimization may decrease the size by up to 40-50%.
For Mac users I can recommend ImageOptim - all you have to do is drag and drop your images into ImageOptim and it’ll remove all unnecessary data and leave you with optimized versions.
For Linux users, you can use Trimage, and for Windows users, sorry I don’t have any recommendations, check out ImageOptim alternatives for Windows.
7. Lazy load images
It is a good practice to load images only when it’s in the viewport, when user scrolls down to it. Before that, they will not be loaded. This will save you many kilobytes in initial page load. Also, maybe some users never get to the bottom of your page, and the images are being downloaded and never seen.
No JavaScript is needed for this, browsers support it natively with the loading attribute:
<img src="image.jpg" loading="lazy" alt="an image below the fold" />WordPress adds loading="lazy" to your images automatically. Just make sure the images at the top of the page, such as your logo or hero image, are not lazy loaded, they should load as soon as possible. Read more about it in understanding the browser’s image loading process.
8. Use image lossless compression
To losslessly compress images you would need to install and use some tools and know how to do that. But there’s an easy way. Have you heard of Squoosh? In case you haven’t, it’s a free web app for compressing images. Drop your image in, choose the format and quality, compare the result with the original side by side, and download the compressed version. It can also convert your images to WebP or AVIF.
To find out which images on your pages need optimizing, run your pages through PageSpeed Insights. If there are any images that can be compressed further, you’ll find them in the “Improve image delivery” section.
Those are my tips to speed up a webpage by optimizing images. Stay tuned for the next articles in this series.